
In Windows 11, Microsoft introduced a new feature called “User Account Control.” The purpose of this feature is to warn users when they are about to make changes that require administrator privileges. In the previous version of Windows, you had to enter your administrative password every time you wanted to install something or change settings. Lets have a detailed look on how to Change Administrator on Windows 11.
With User Account Control, it’s much easier for people who don’t have access to an administrator account on their computer. All they need do is click a button and wait while UAC informs them what will happen if they proceed with the action. It can be difficult sometimes to get past this warning screen if you only have limited user privileges on your PC. Fortunately, there is a way around it!
How to Change Administrator on Windows 11
What is an administrator account in Windows 11?
The administrator account in Microsoft Windows is the most powerful. As an administrator, you may control your PC however you like. You can make changes to system files, install elevated applications, customize your Windows installation, set up custom automation, and a variety of other things. Standard or guest users are unable to perform such tasks. Furthermore, as an administrator, you may control Windows capabilities and dictate which ones are available and accessible to your users.
Types of Account in Windows 11
User accounts on Windows 11 are divided into two categories: Standard User accounts and Administrator accounts.
The administrator account has total control over the Windows 11 system or device. It allows you to install hardware and software, access all files, modify settings globally, run elevated activities, create or remove new user accounts, and so on. If you forget your password or are locked out of your computer, having another administrator account as a backup is advised.
In contrast, the Standard account is quite restricting. A Standard User can only use pre-installed applications and cannot install or remove apps. It prevents you from making changes to computer settings such as locale or user accounts. It can only do basic activities, and if an app or setting need elevation, they’ll need administrative access to finish the job.

Why do you need an administrator account?
An administrator account is the most powerful type of user account in Windows. This implies that you may make system-level modifications to your operating system using an administrator account with impunity. Here are a few of the most frequent reasons why you’d need an administrator account on your PC.
- To modify your system at a whole level, you’ll need to use the System Configuration Utility.
- Modify, edit, or repair your system files
- To execute administrator-level instructions and scripts, type “cscript”.
- Windows features can be enabled or disabled from the Control Panel.
- To install system-level applications and modifications, go to the Start menu or use Windows Explorer.
- Update or replace your drivers, follow the instructions below.
- To customize Windows, click Start, type gpedit.msc in the search bar at the top of the window (press “Enter” after typing each letter), and then double-click on gpedit.msc to launch it.
- To delete or update local account passwords, click here.
There are two types of administrator accounts in Windows 11, and they’re both required. There might be a variety of reasons why you require an administrator account in Windows 11, but did you know that there are two types of administrator accounts in Windows? Not precisely, but here’s everything you need to know about them.
How to Change Administrator on Windows 11 Using the Settings App
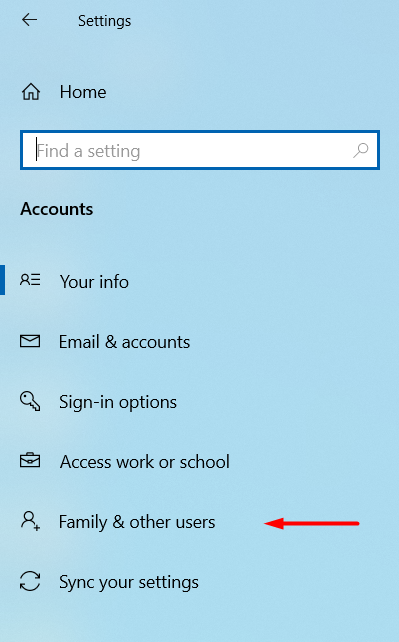
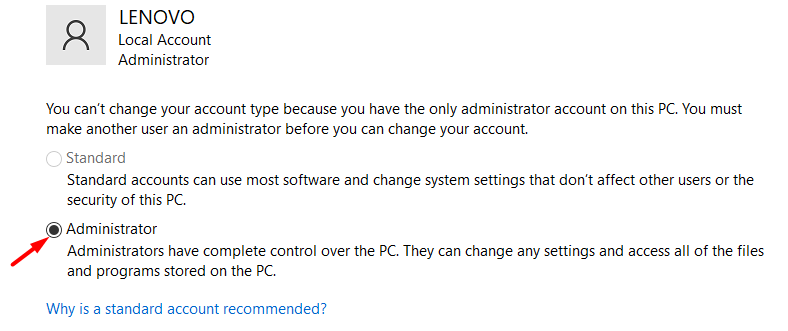
Administrator access is required to change a user account type. So, if you only have a basic account, you’ll need to get permission from an administrator to do so. The administrator may modify this by going on to Settings > Account > Family & other users and changing the user’s account. Change the user’s account by selecting Change account, then Administrator.
- Right-click an empty area of the screen, then select Control Panel from the drop-down menu. Open Control Panel by clicking its icon in the lower-left corner of your screen. It looks like a Windows symbol.
- Select the Settings option from the drop-down menu, then choose your preferred settings by clicking that gear symbol just above the power symbol.
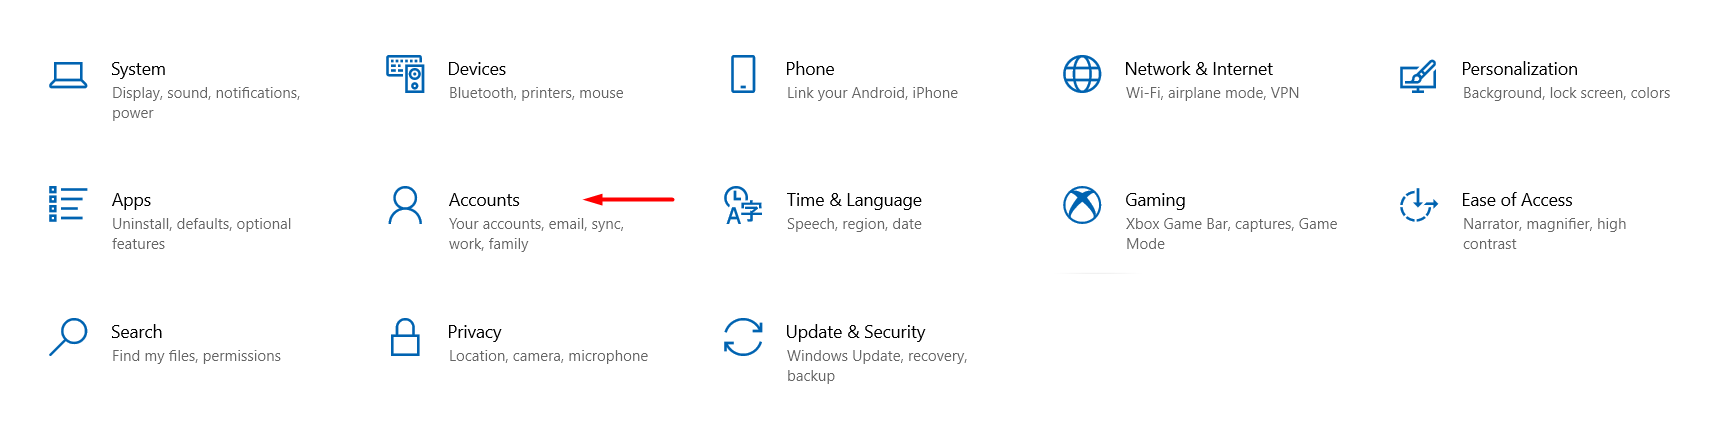
- Select Accounts from the drop-down menu.
- Choose a family or other users. This choice may be found in the left sidebar.
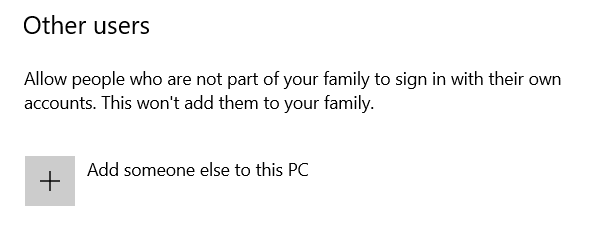
- Visit the Other user’s panel and select a user account.
- Click the Change Account button in the top-right corner of your main page, then choose a Change account type. When you click on a user account, this option appears.
- Select Administrator in the Change account type dropdown.
- Finally, click OK to confirm your settings. When you return to the Other user’s panel, the changes will be reflected.
- Repeat these steps for each user account you wish to modify. However, be sure you always have access to at least one user with Administrator permissions. Otherwise, you won’t be able to make any modifications later on.
Also Check: How to Add and Customize Widgets in Windows 11
How to Change Administrator on Windows 11 via Control Panel
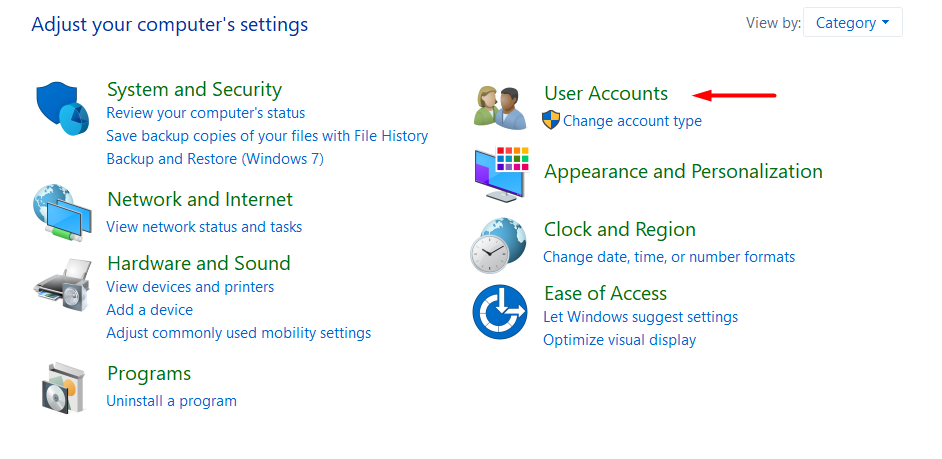
You may switch a user account type by navigating to Control Panel, selecting Change Account Type, and then select the user you want to make an administrator. Finally, confirm the change by choosing Change Account Type before your changes will be saved.
- Open Start. Click Control Panel from the search results.
- Open the app in your search results.
- Go to the User Accounts section, select your user account type from the drop-down menu, and click Change Account Type.
- Click the user that you wish to modify.
- Then, under Change account type, select a different account type.
- Make sure the Administrator checkmark is selected.
- Go to your download page and select Change Account Type. When you return to the previous screen, the changes will be shown.
- Repeat these steps for each user you want to modify. However, make sure that at least one user has administrator privileges. Otherwise, you won’t be able to make changes later.
The Standard User account type is more limiting in comparison. Users with the standard account are able to use apps, but they are not permitted to install new ones. They may modify settings, however only those that do not interfere with other accounts, which implies that systemwide parameters cannot be changed. They’ll need administrative permissions to finish any task if needed.
It’s usually advised to utilize a standard account with limited permissions since it provides a safer environment. However, depending on the circumstance, it might be necessary to convert the account type from Standard User to Administrator (or vice versa), and Windows 10 includes several ways for doing so using Settings, Control Panel, User Accounts, PowerShell, and Command Prompt